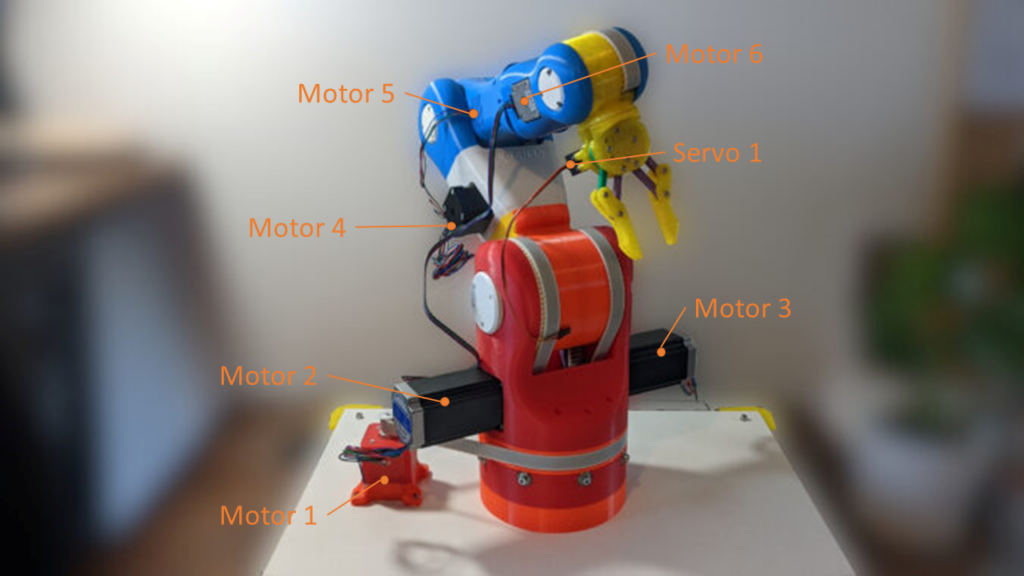
First, a little bit of definition. In the image below, the motors have now numbers according to its position.

Now we can talk about a specific motor. In the third part of this series, I have mentioned the … Read the rest
DefVar | Electronics and Software
First, a little bit of definition. In the image below, the motors have now numbers according to its position.

Now we can talk about a specific motor. In the third part of this series, I have mentioned the … Read the rest
In this post, we’ll install the brain for our MOVEO project. Instead of the teensy, we’ll use an Arduino because it is for now better to handle. In a future post, I’ll potentially change the processing unit, but for now, … Read the rest
I want to create a housing for the PSU, so we don’t have to mess with open 230V / 110V wires. I decided to use a default IEC320 C14 connector for voltage in and three XT60-Connectors for voltage out. The … Read the rest
If you ever tried to measured soil humidity. You come across the ESP32 Soil Sensor PCB. It’s quite pricy for $20. I could not find a lot of documentation for this particular sensor. So, I decided to by one and … Read the rest
Foremost, this power distributor solution is not a final one. We need a distributor that can divide about twenty amperes into 2×5A, 3×1.5A and 1×1A plus the current needed by the microcontroller.
The chosen power distributor is from a model … Read the rest
In this part, we’ll implement the concept from last week’s post. We will print the brackets and mount the DIN rail. If you missed the concept, read more in the last block post. If you want to learn how to … Read the rest
This post is only about the upcoming electronics mount design. I changed a lot, I found it very difficult to came up with a design. The first design was some kind of compact housing like the original design with the … Read the rest
The gripper is an easy to assemble part. I had some issues with the servo horn. I could not find the correct one, so I designed and printed it myself. Because I changed the serv horn I had to change … Read the rest
The 4rd module comes with some issues, that we had to solve. The motor I chose did not fit inside the 4M1 part, and the bad print quality from my 4M1 part forced me to file some layers down. If … Read the rest
This week’s blog post is the second part of the part 9 assembly. We’ll start with the step 4 and finish the Module 3 in this post. If you don’t have read last week’s post, check it out here.
… Read the rest© 2026 DefVar
Theme by Anders Noren — Up ↑