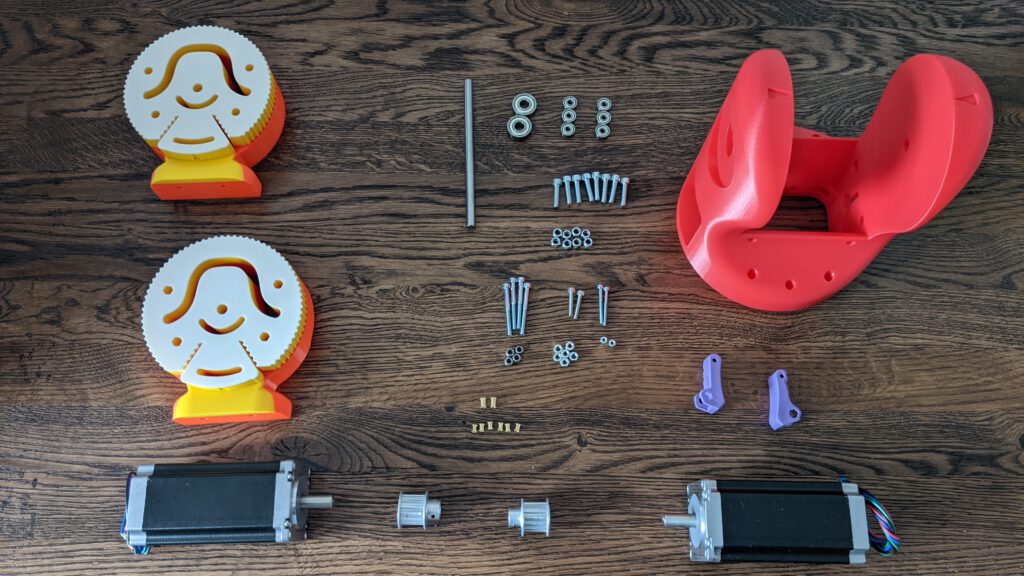
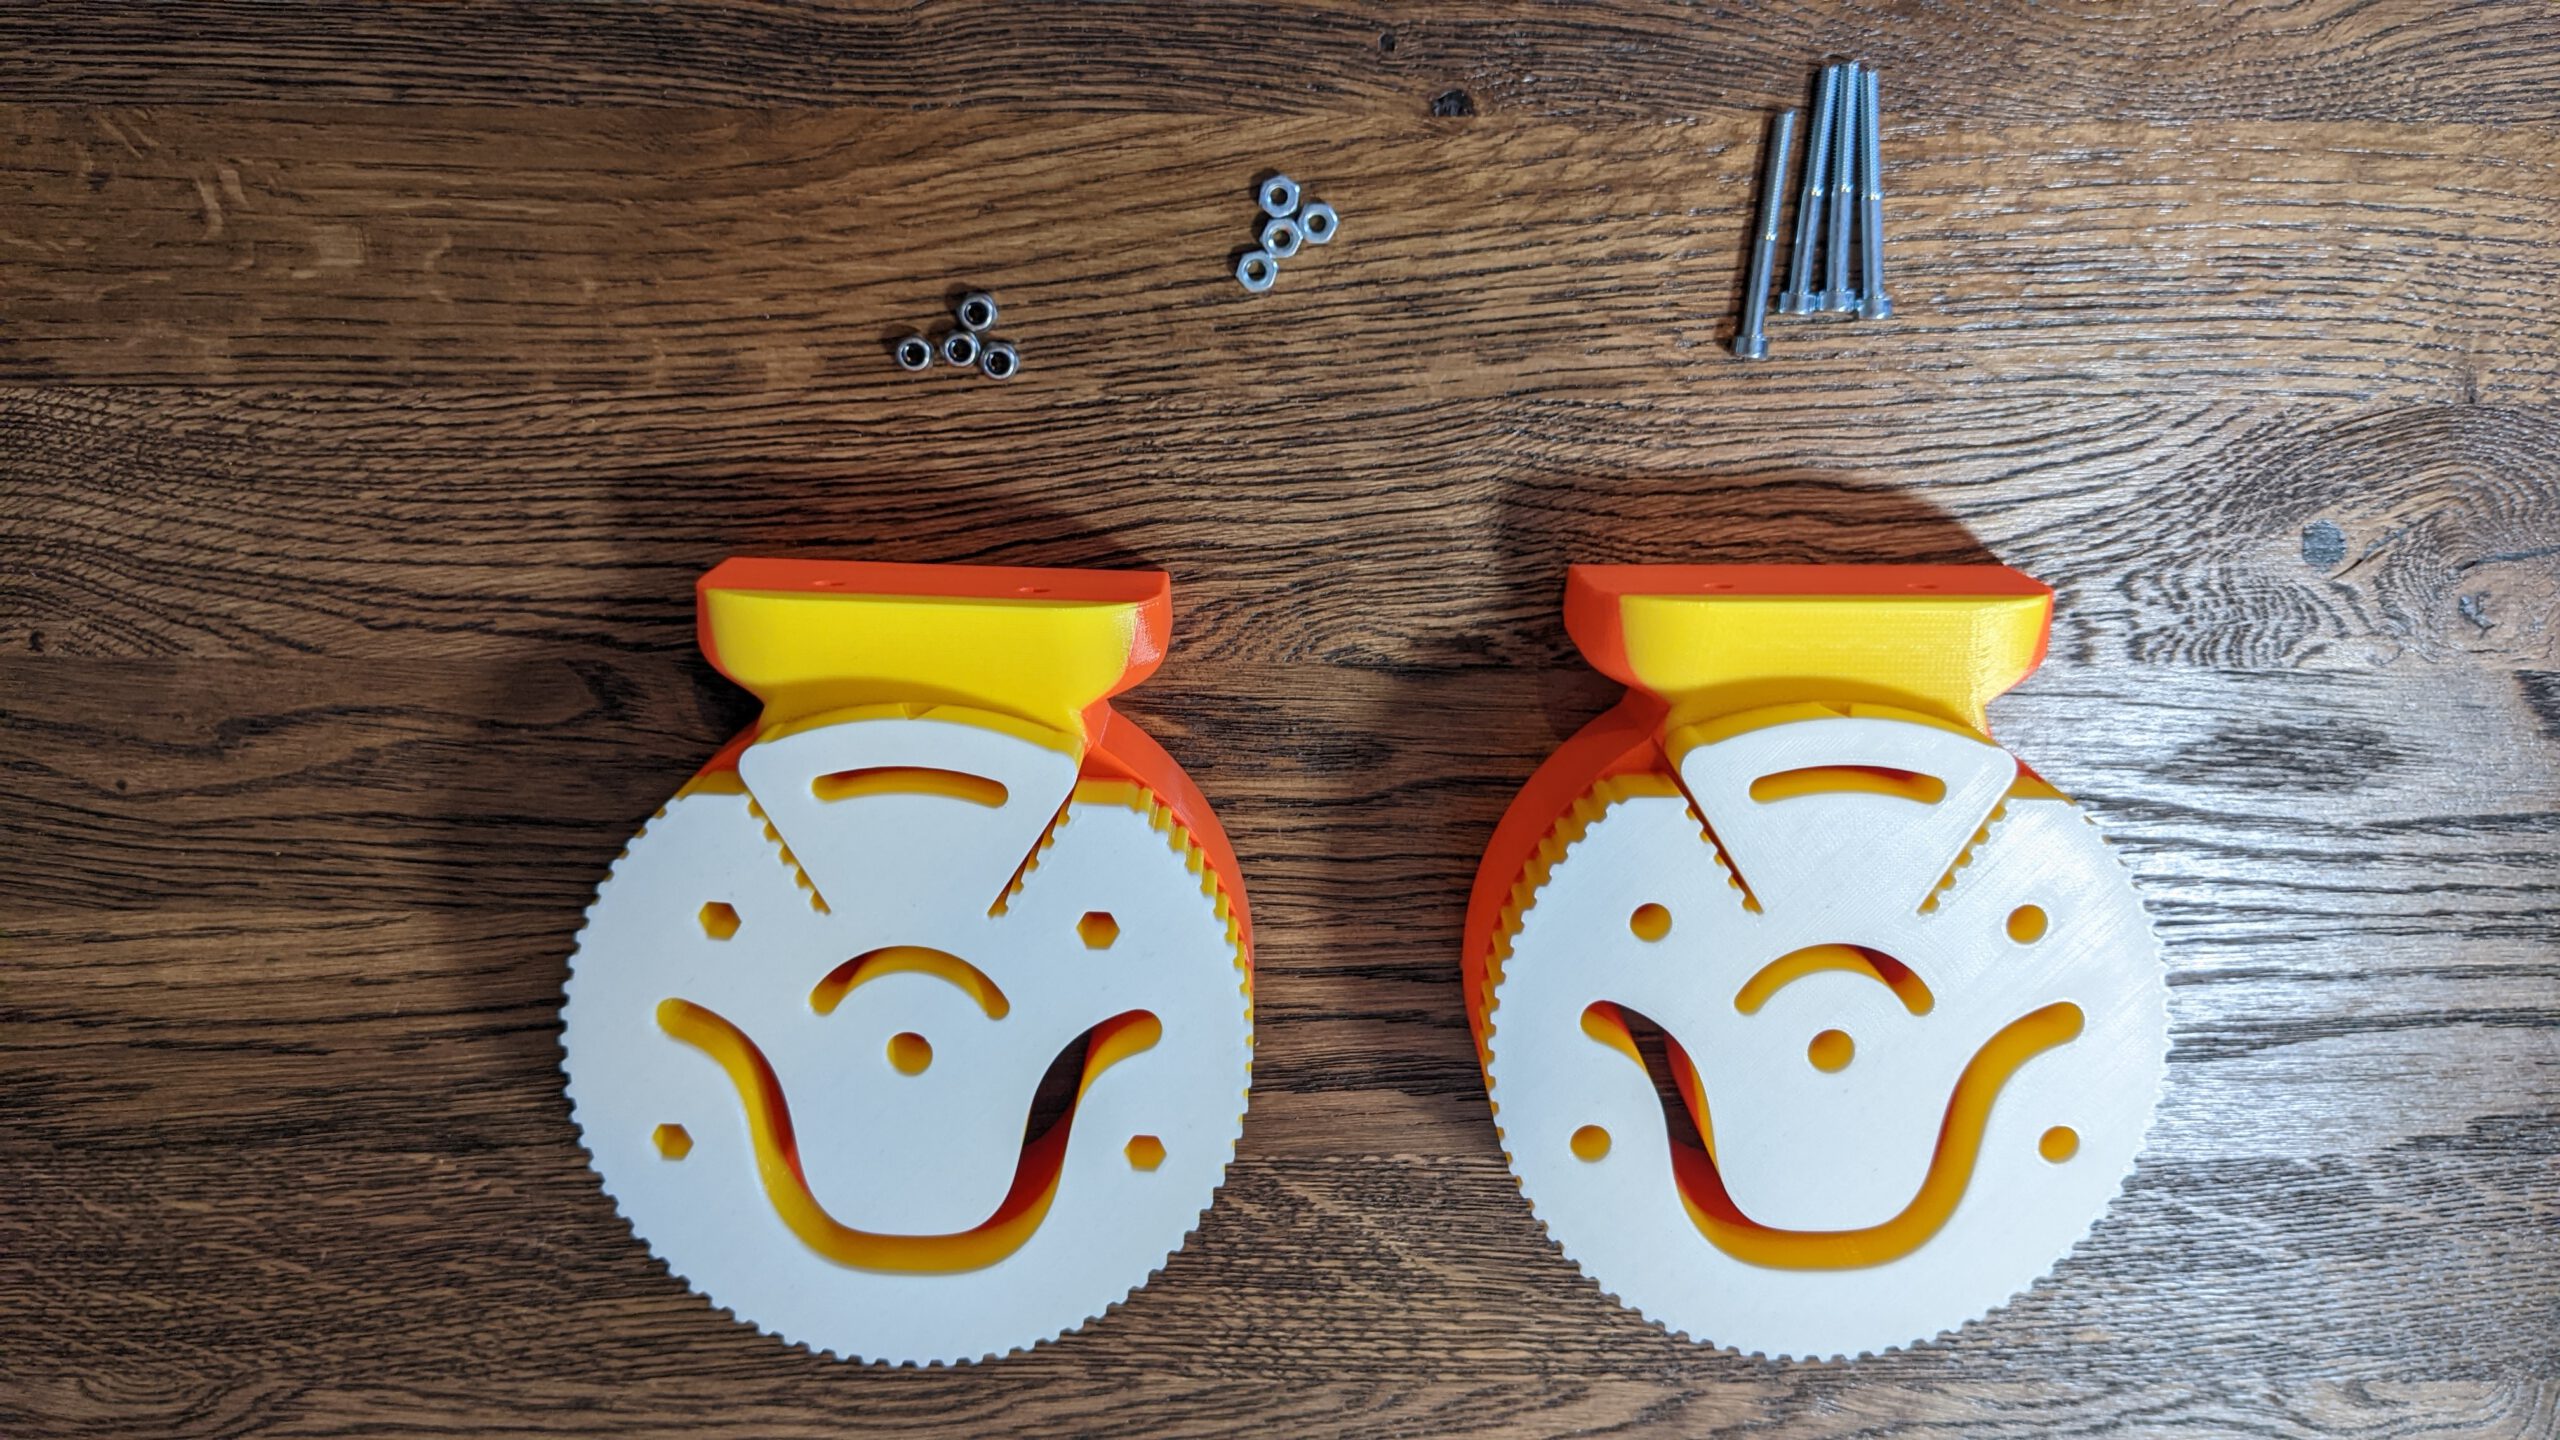
In this part, we will build the “Module 2” of the BCN3D Moveo robot arm. The manual did not show us how we can install the belt at the end. In this post, there is a chapter specifically on this topic. So, you can have an easier installation than me. Unfortunately, I had a couple of bad prints with the 3D-printed part T2M1D and T2M1l. I had to modify them afterwords. If you want to know what I did exactly, stay tuned.
Building
Resources
BOM (Click me)
If your print has a better quality than mine, no tools are needed. Expect from the seconds glue. The brass insert that I bought have a thinner outside diameter, so I had to glue them in.
Tools
- 8 mm drill
- 6 mm drill
- seconds glue
- Tongs
- HX1, HX3 and HX4 Screw driver
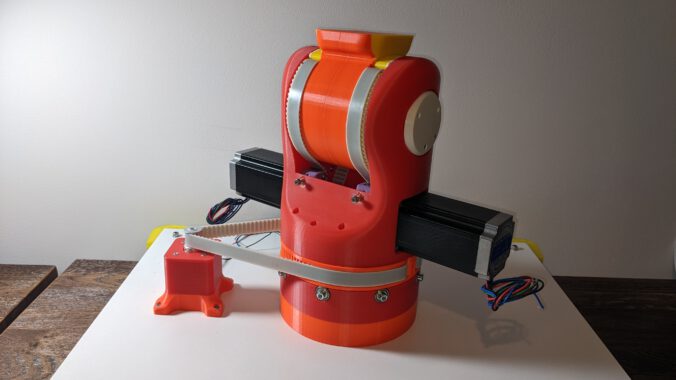
Step 1: Assembly 2M2


In this step, we’ll build the main rotary axis. The Manuel is straightforward. Important are the M4 nuts. If you forget these in this step, you have to disassembly the hole module 2 to mount module 3 in the next part on it. You will only notice that you forgot the nuts if you want to mount module 3 on it.
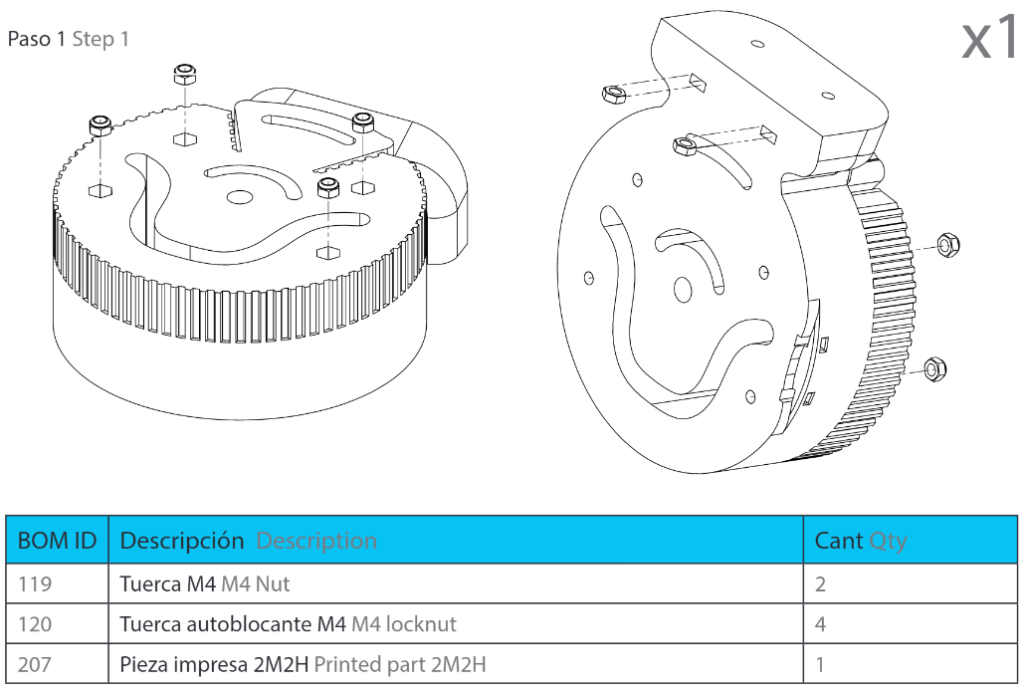
Something that I was thinking during assembly of this part was that the screws are very long.
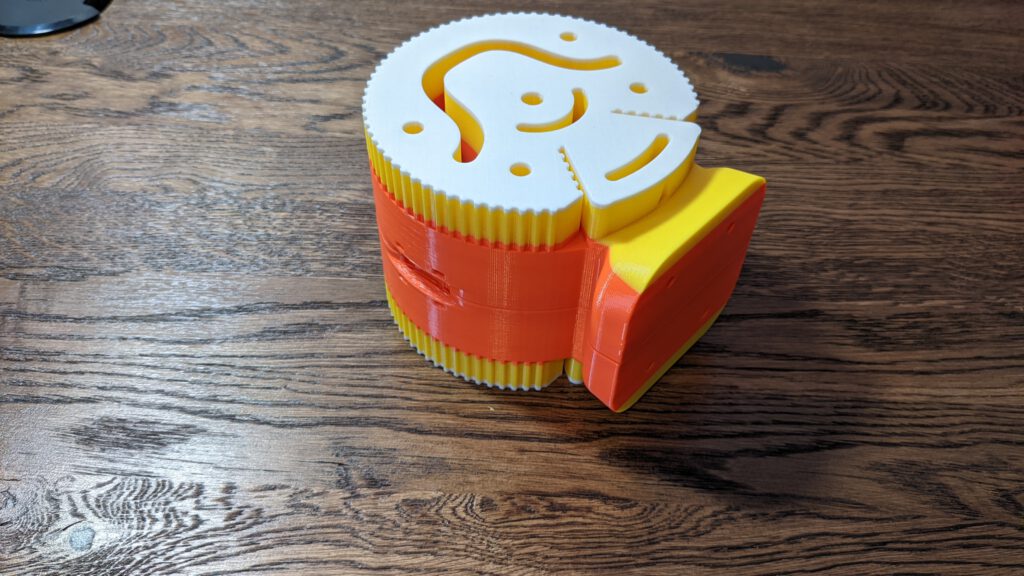
You can easily use M4x30 or M4x25 screws to mount the parts together. The finish result should look like the image below.
Step 2: prepare the belt stretcher


In this step, I had to overcome a few hurdles.
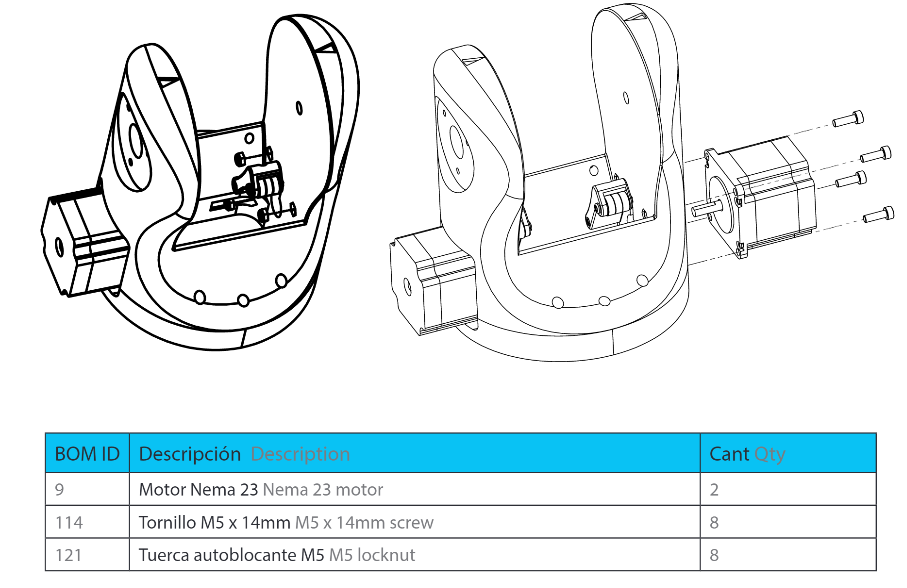
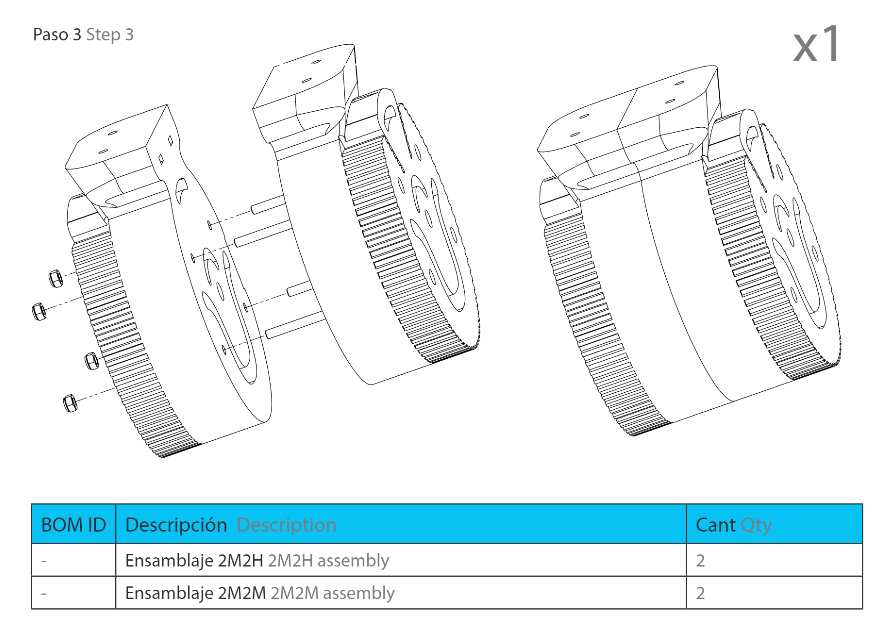
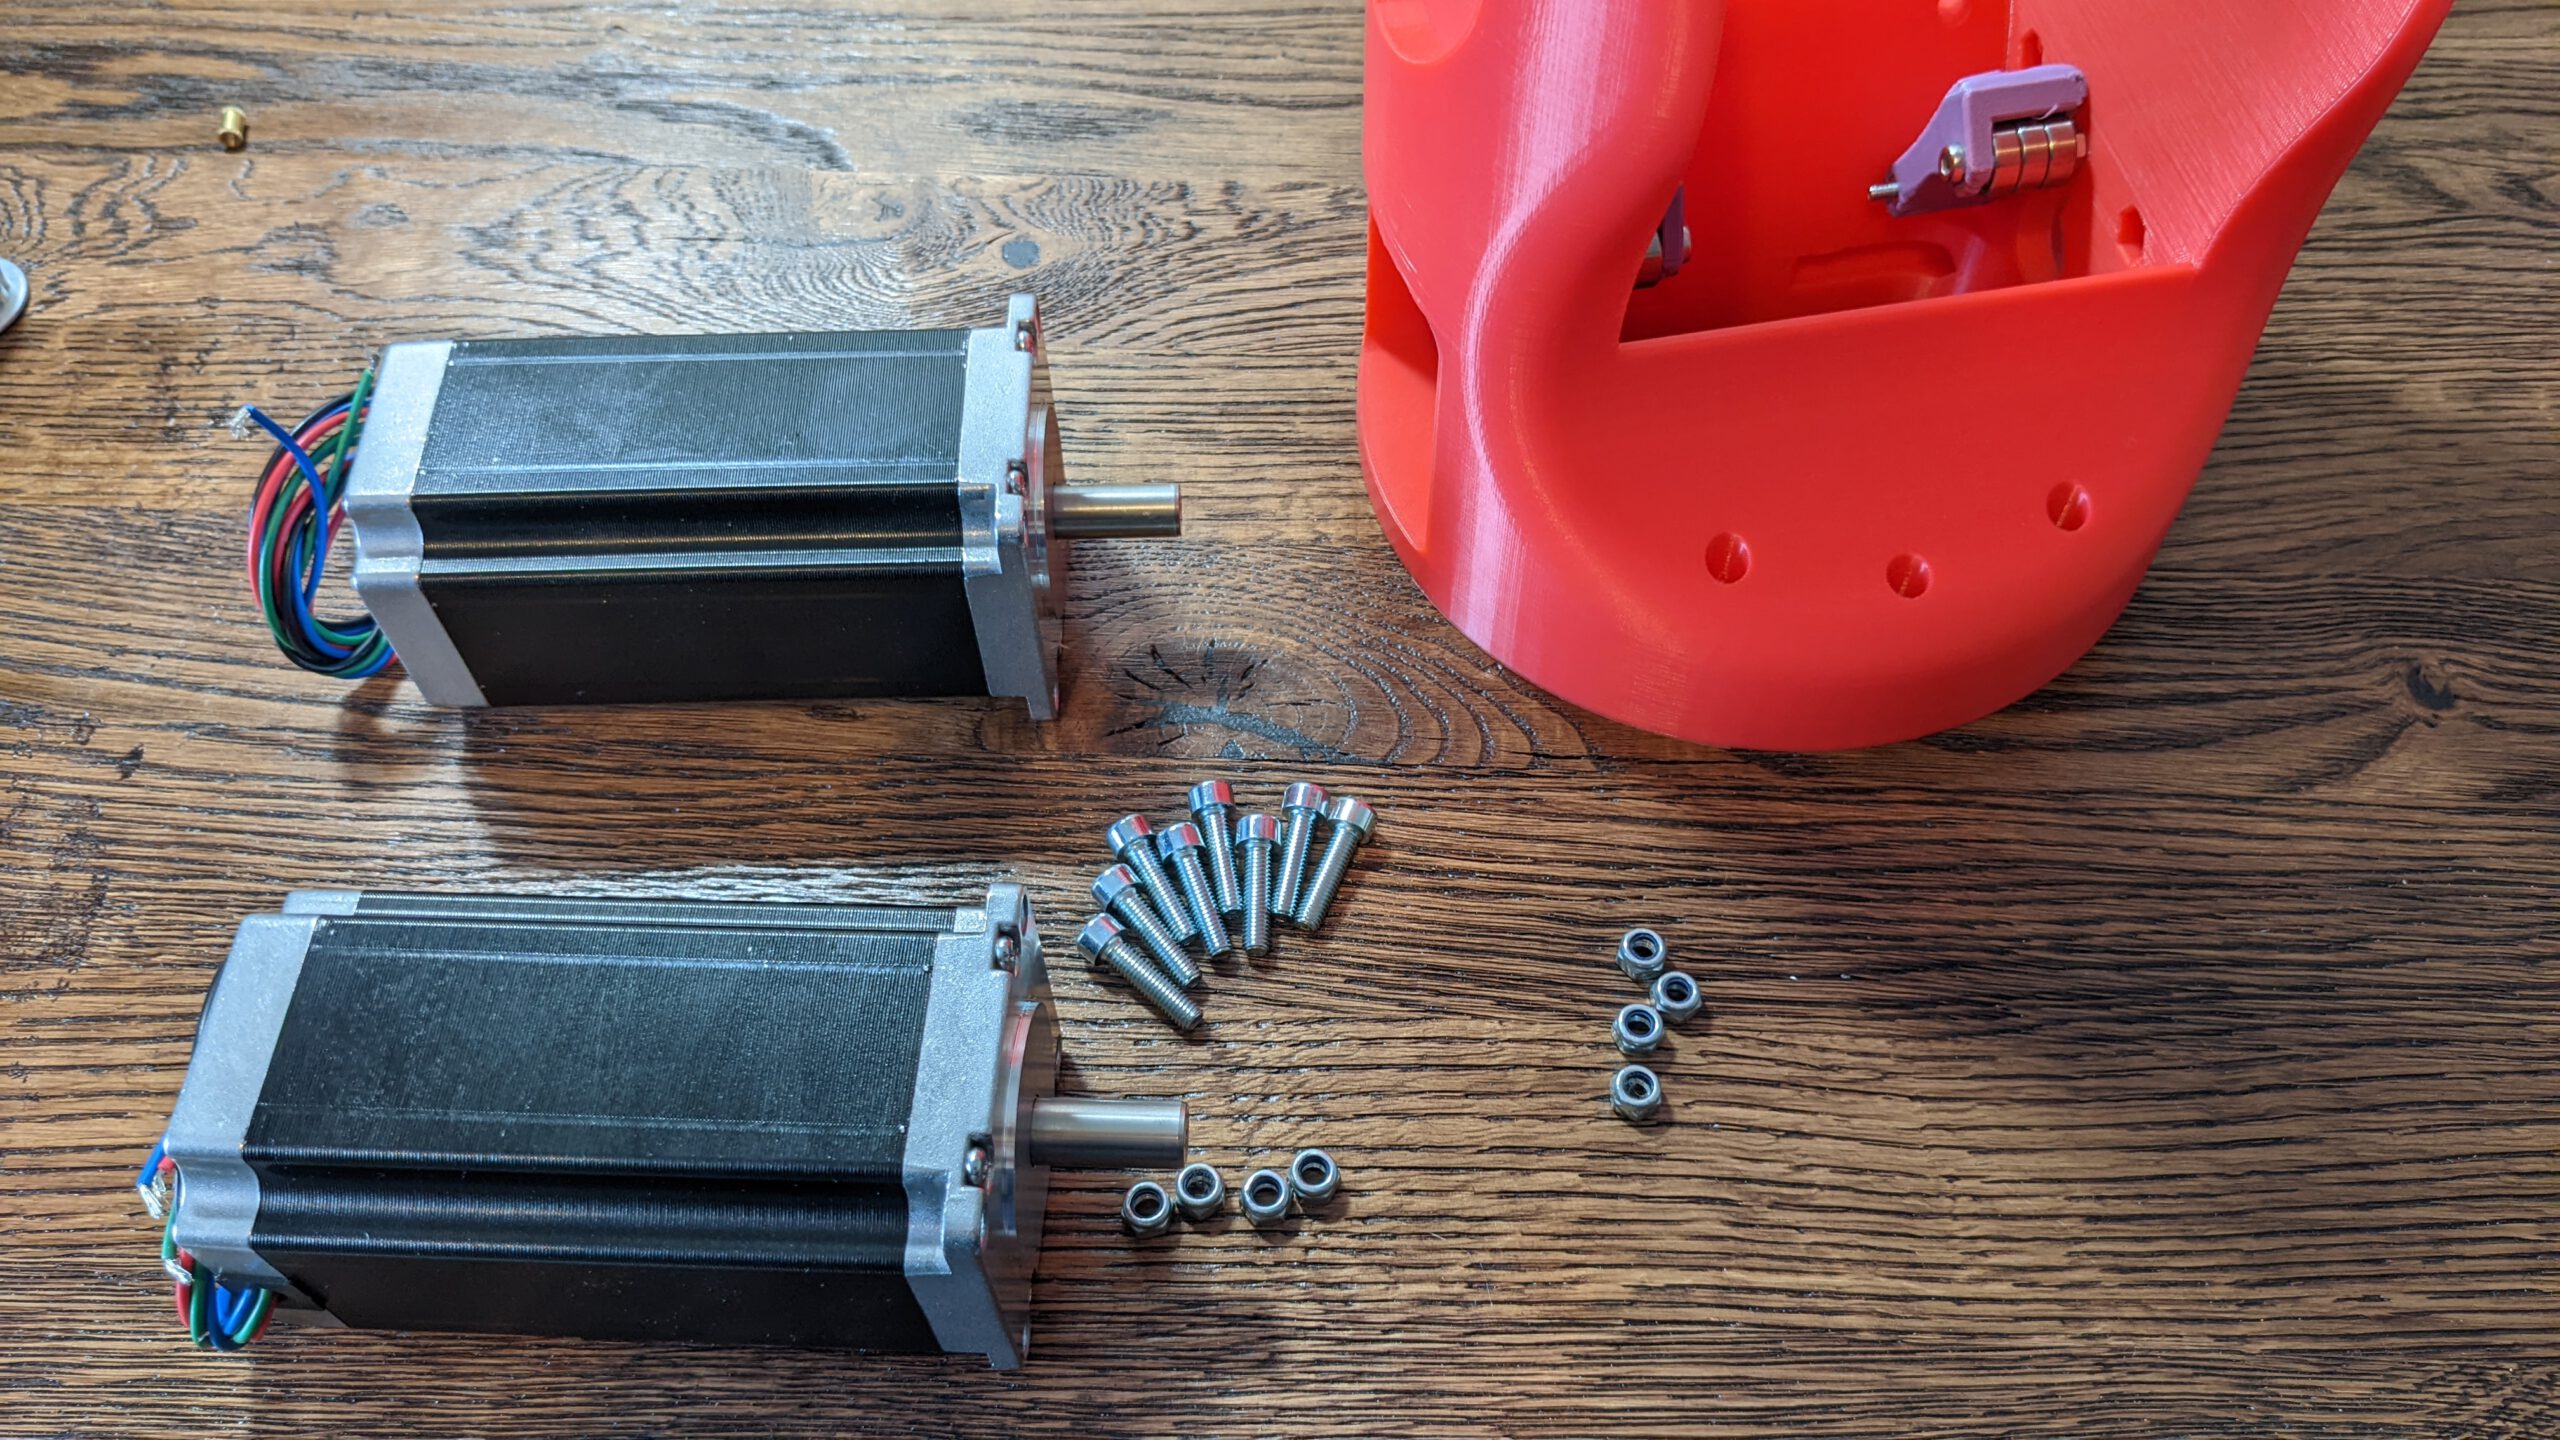
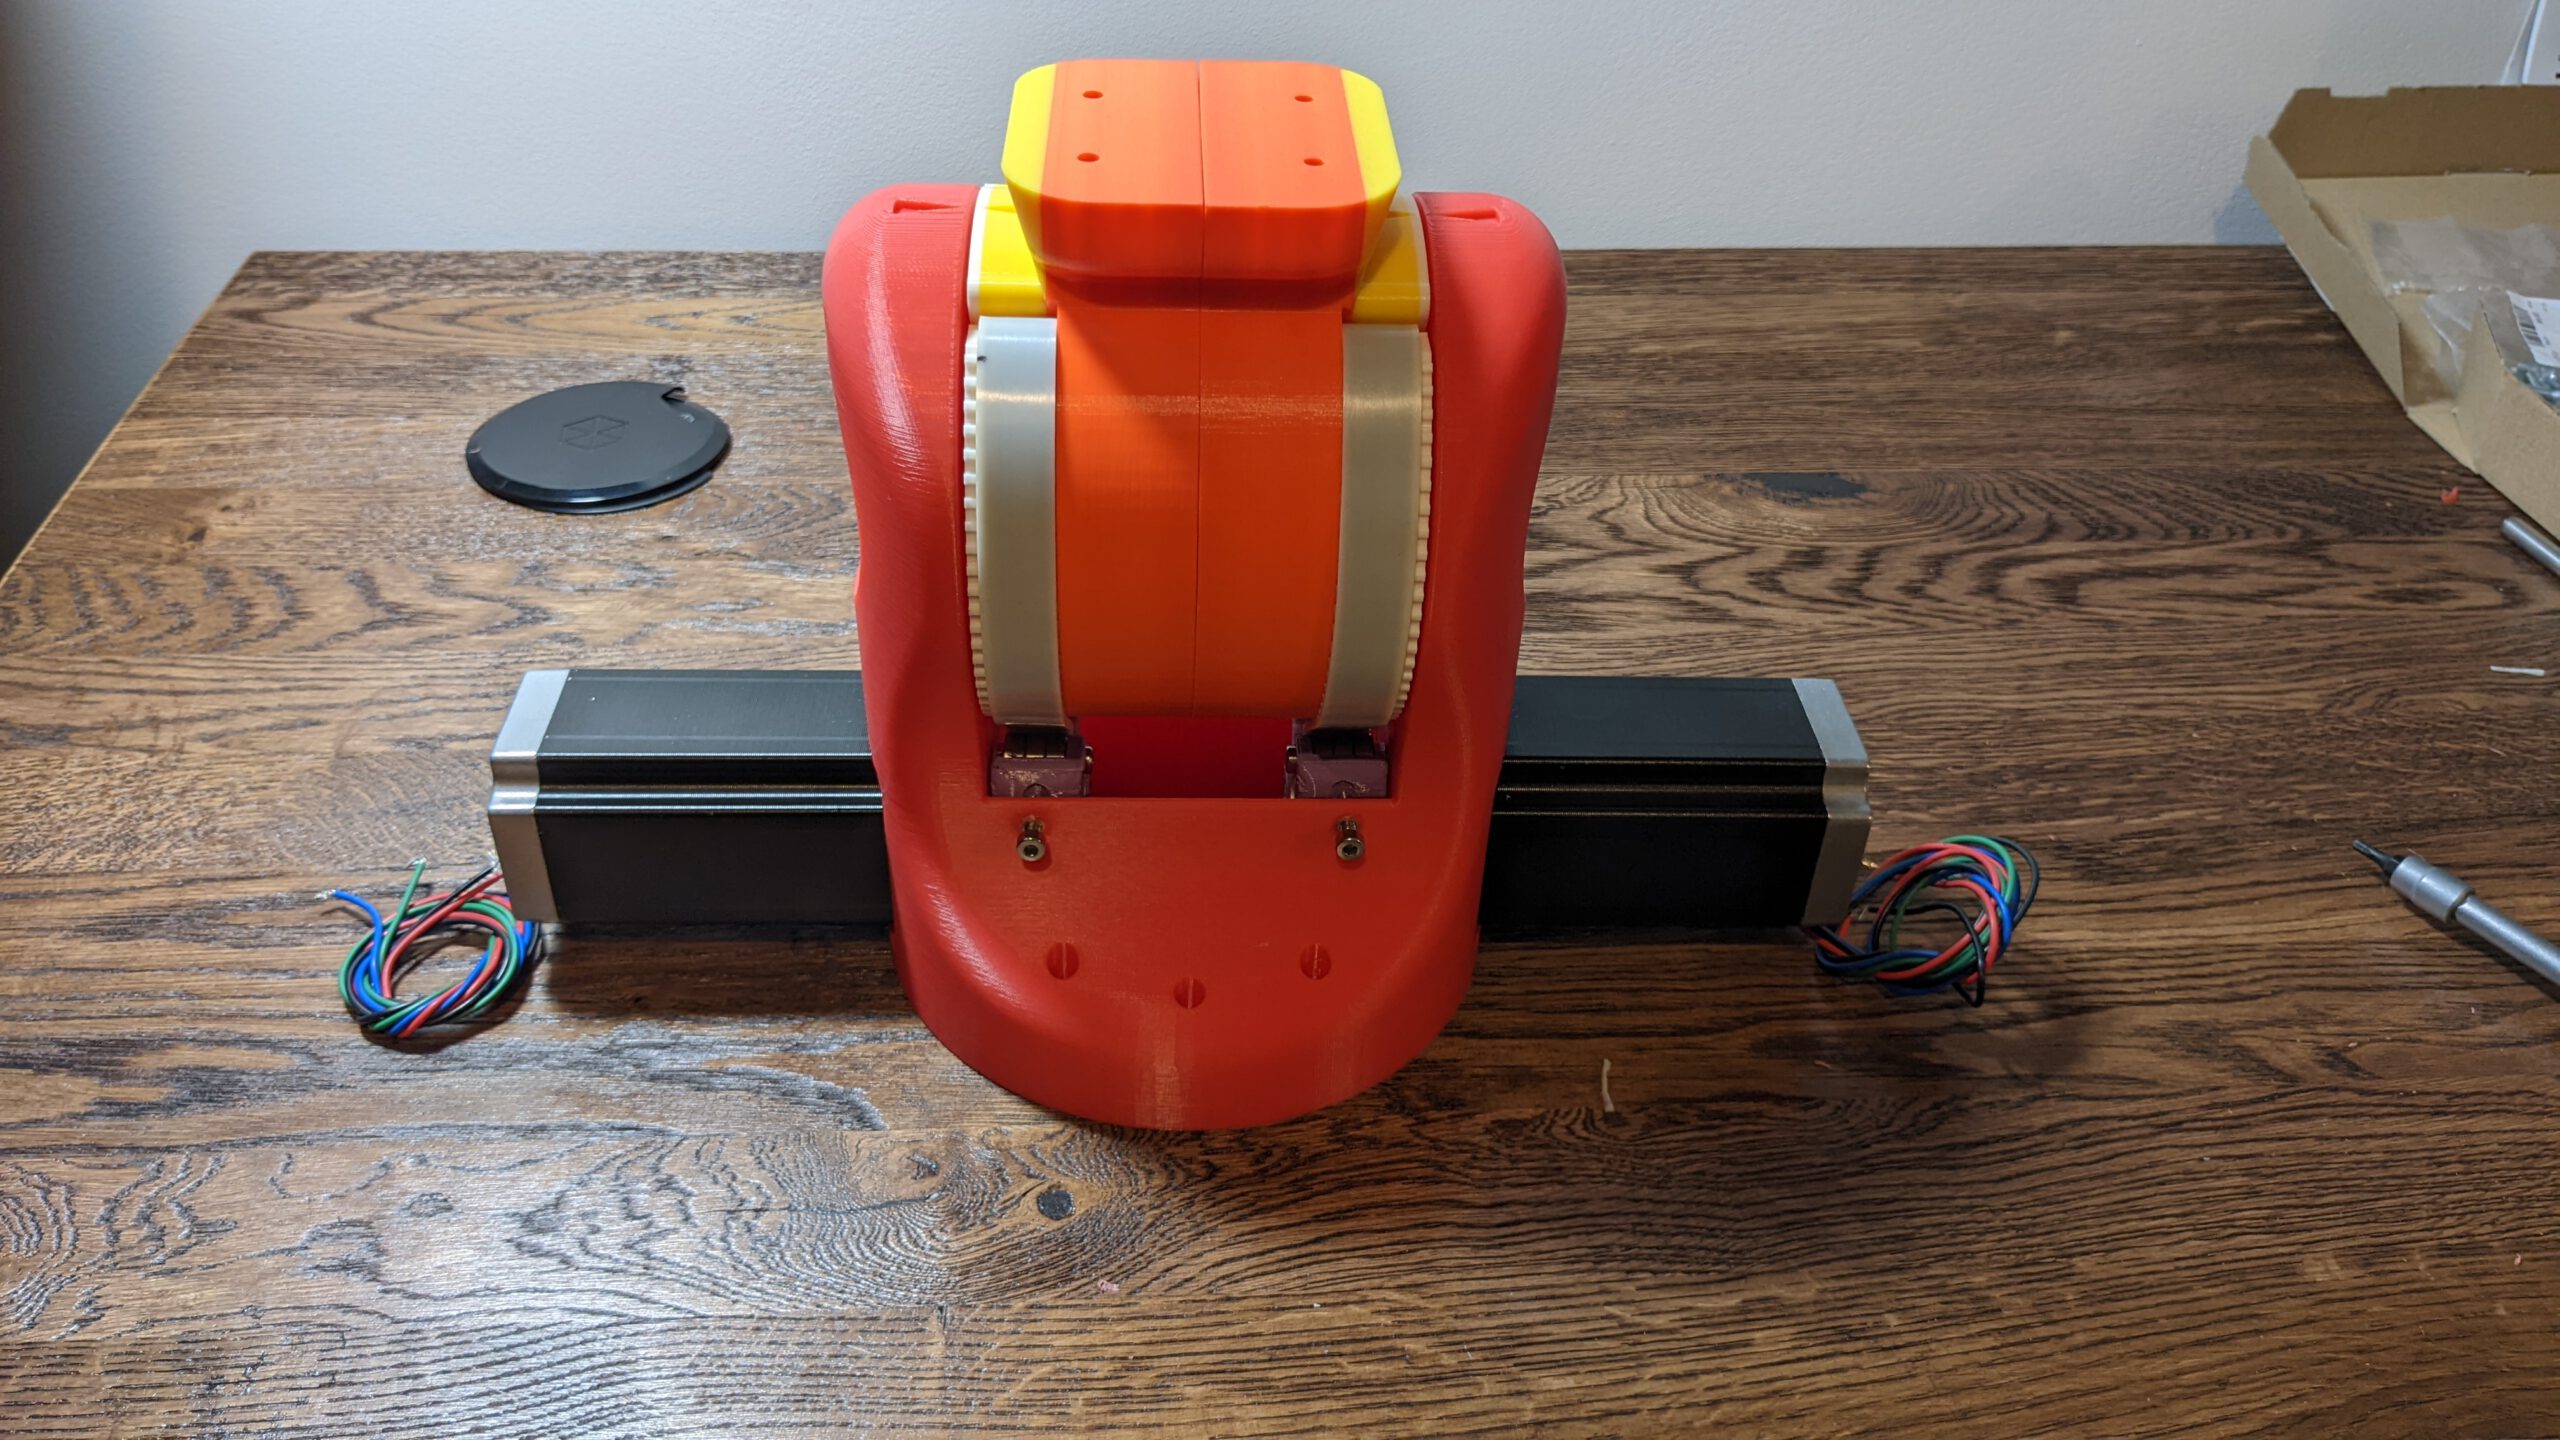
Step 3: Mount the engines
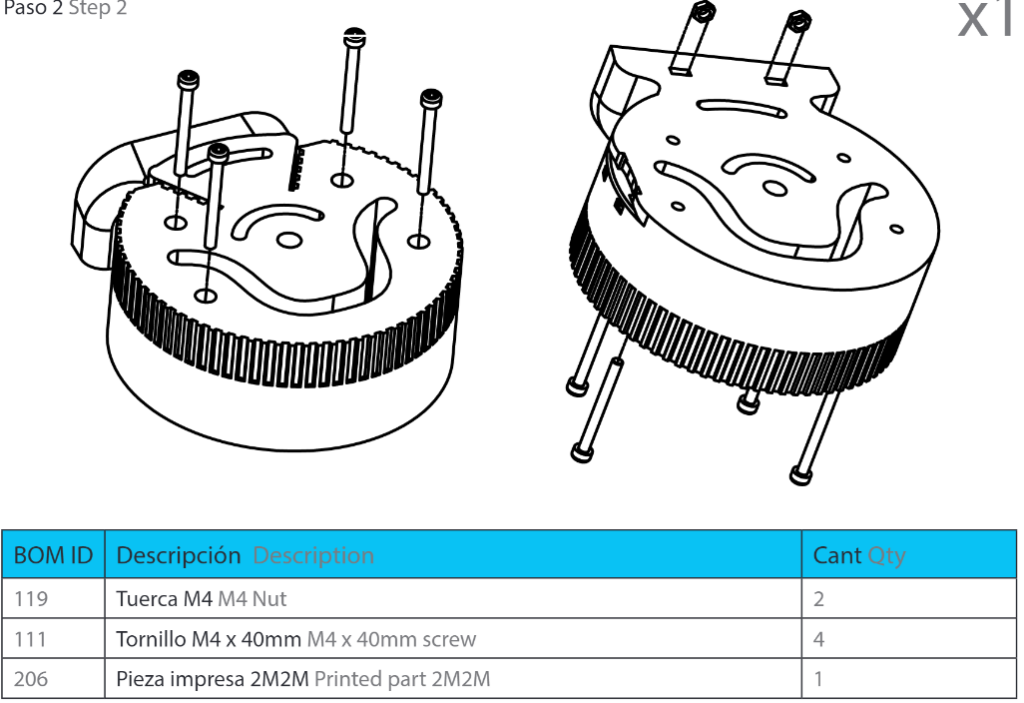
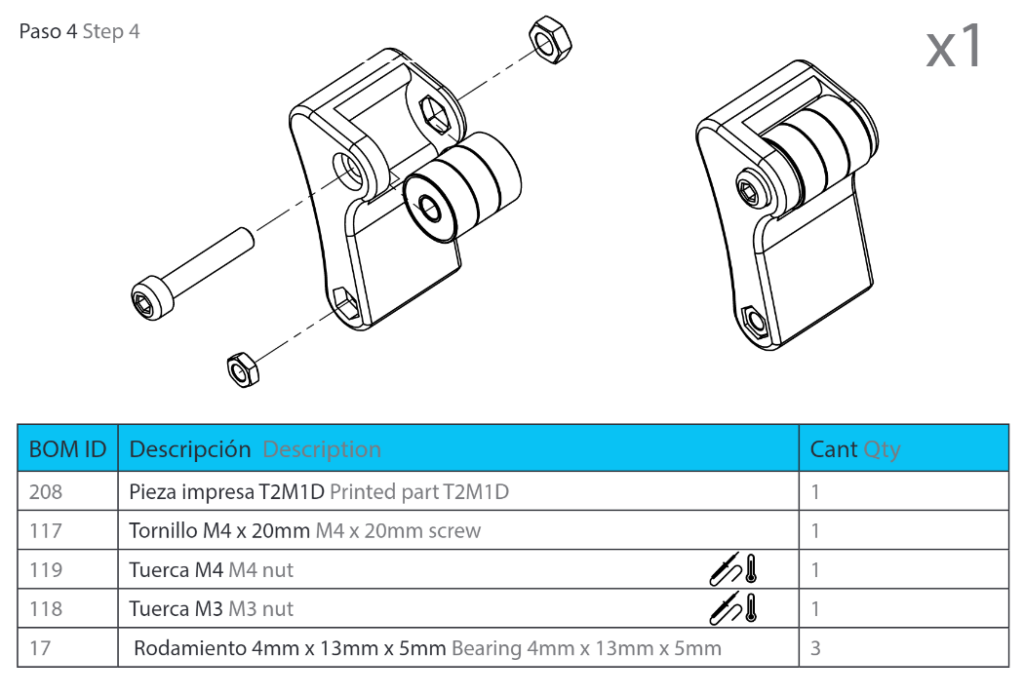
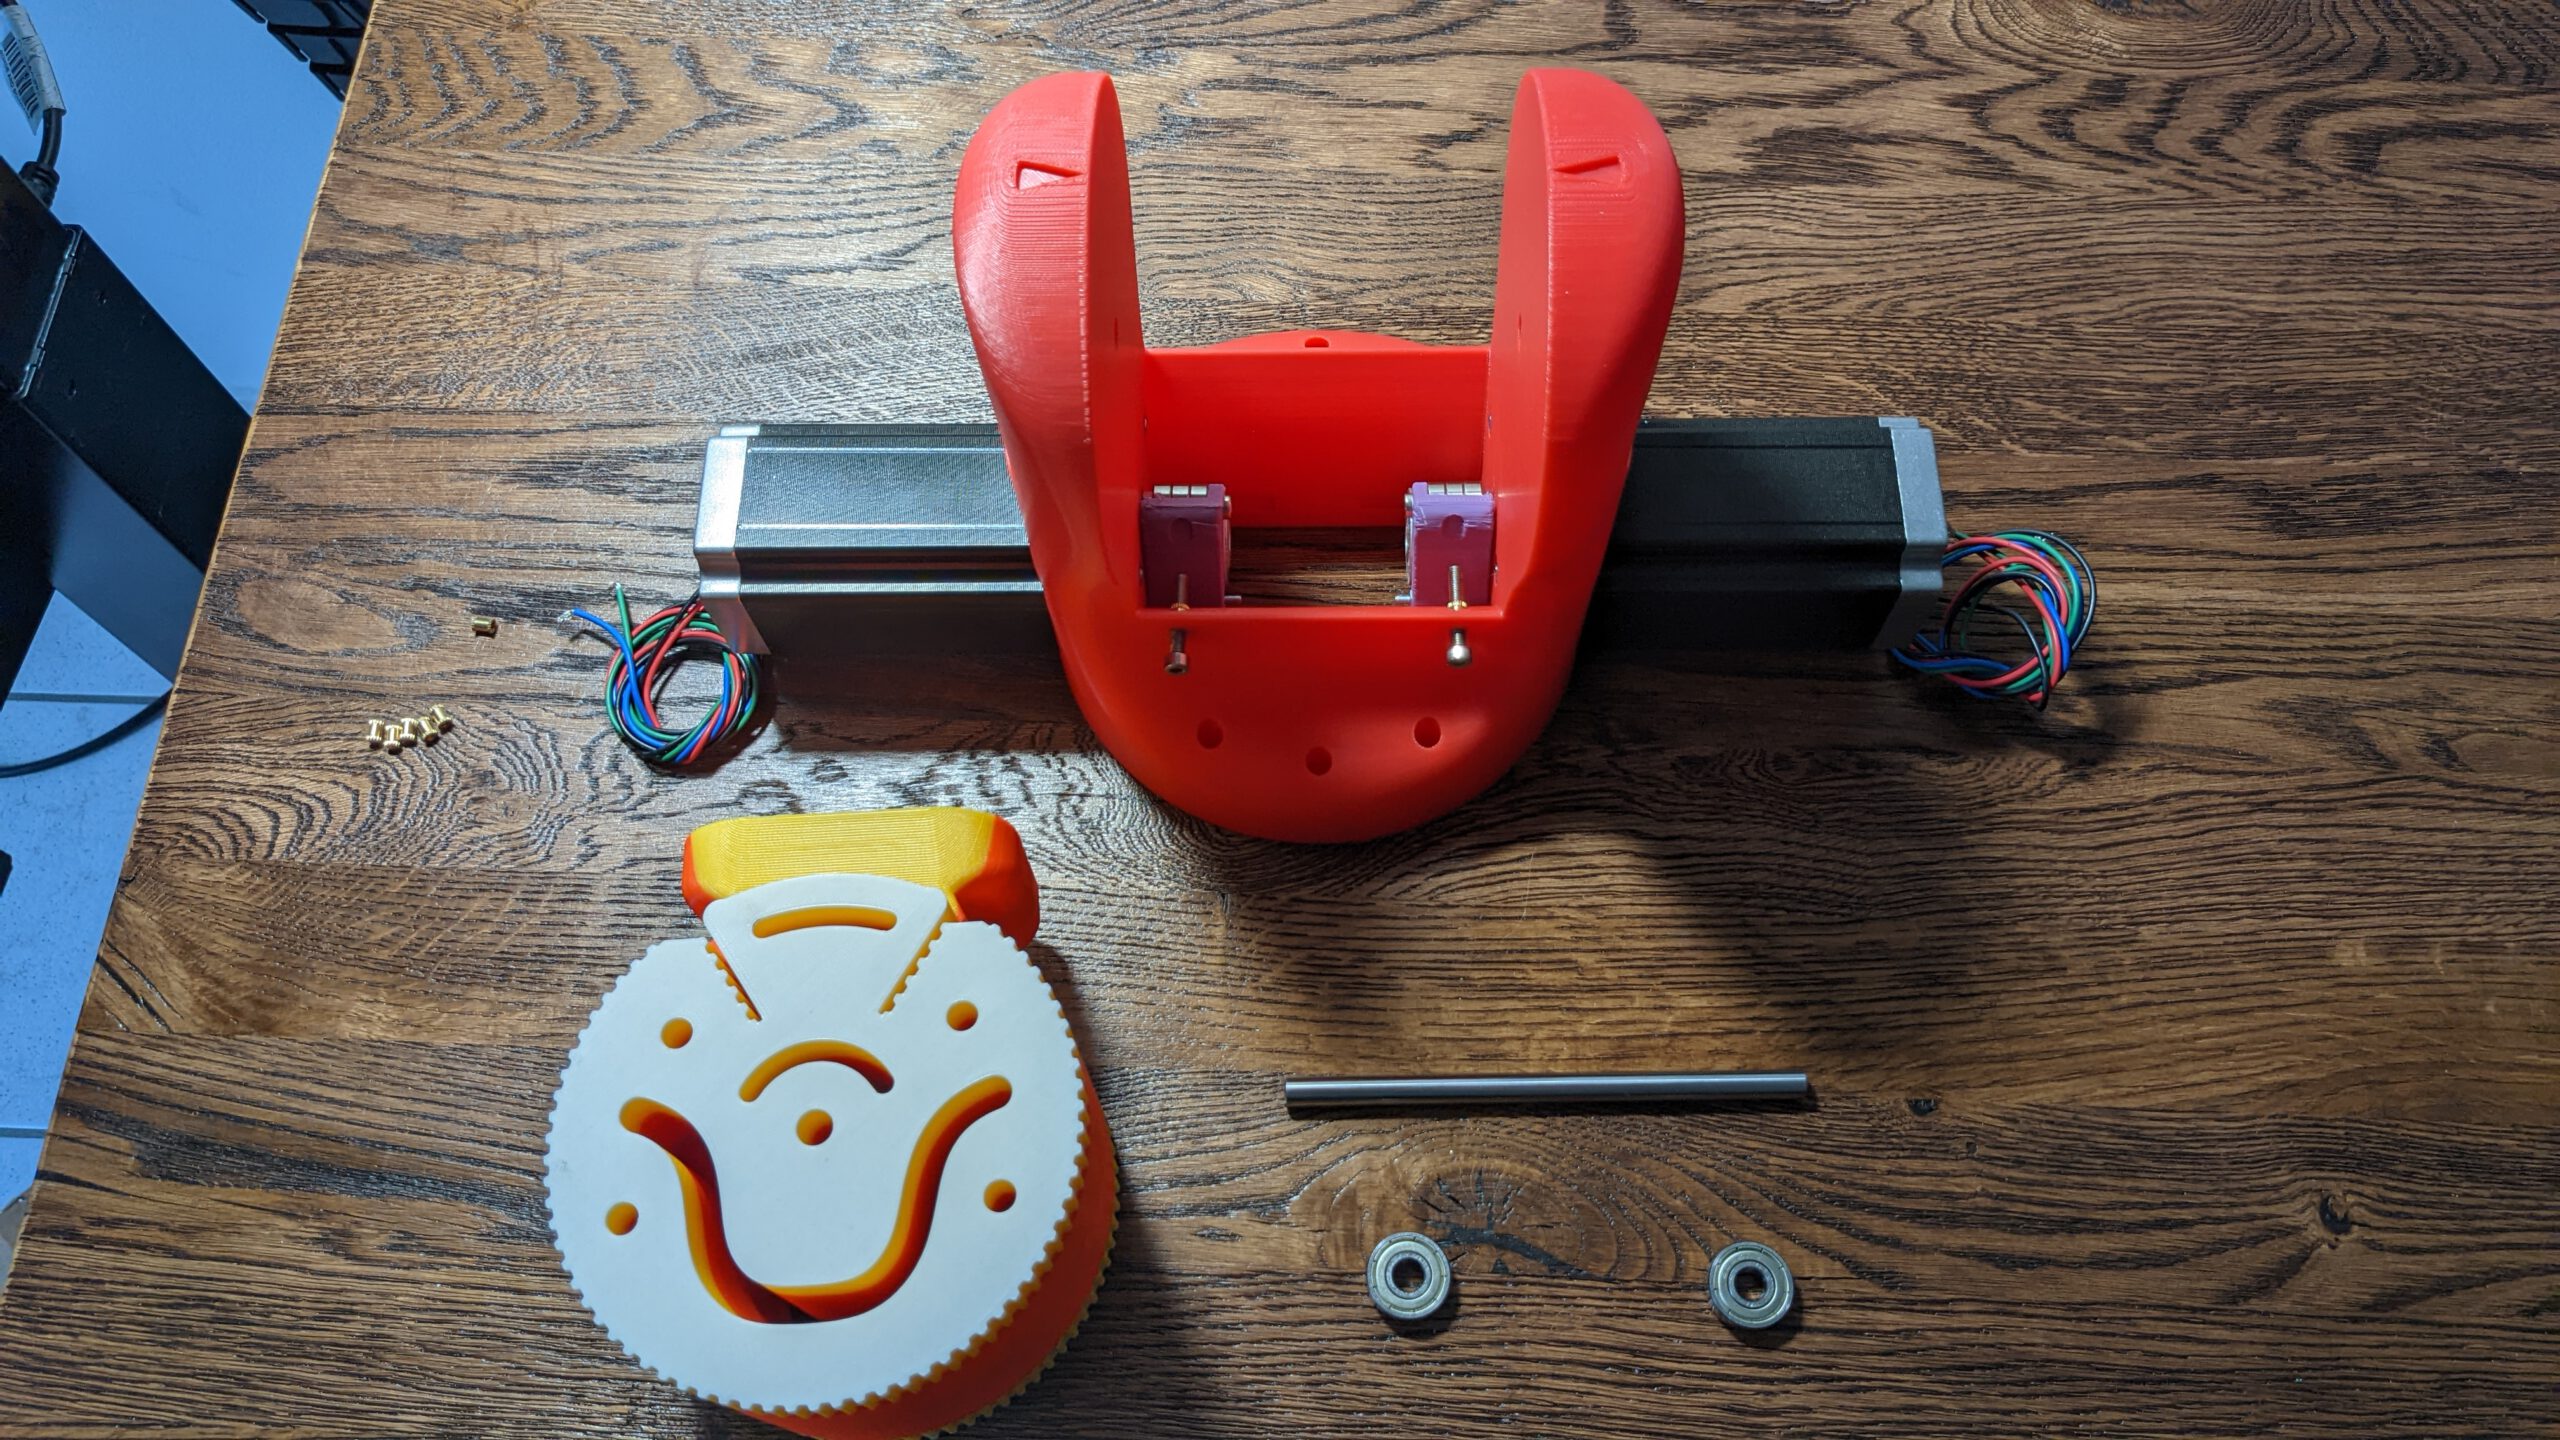
Step 4: put everything together
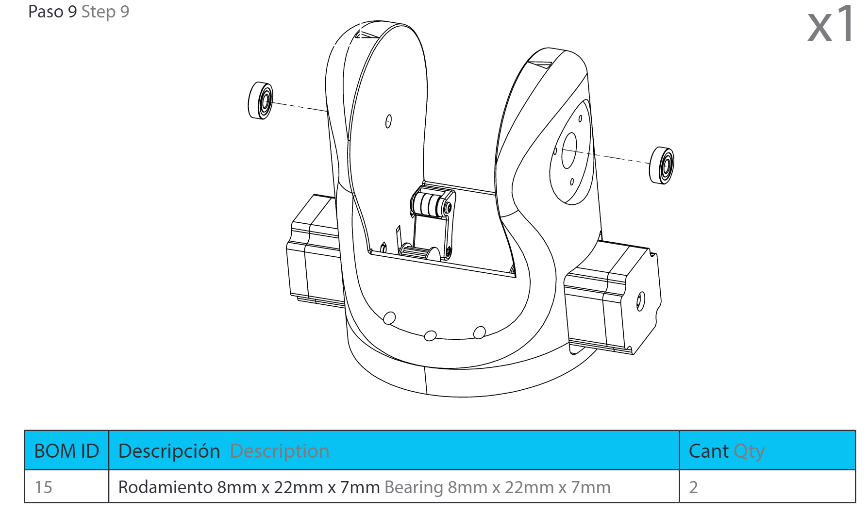
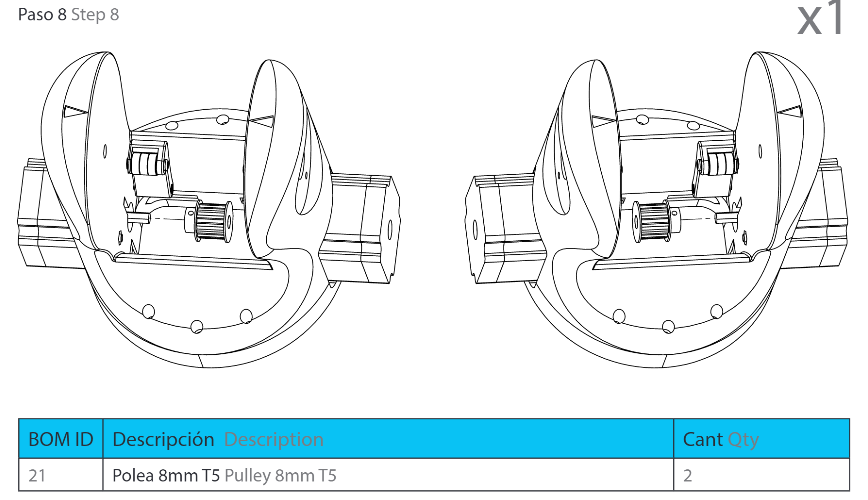
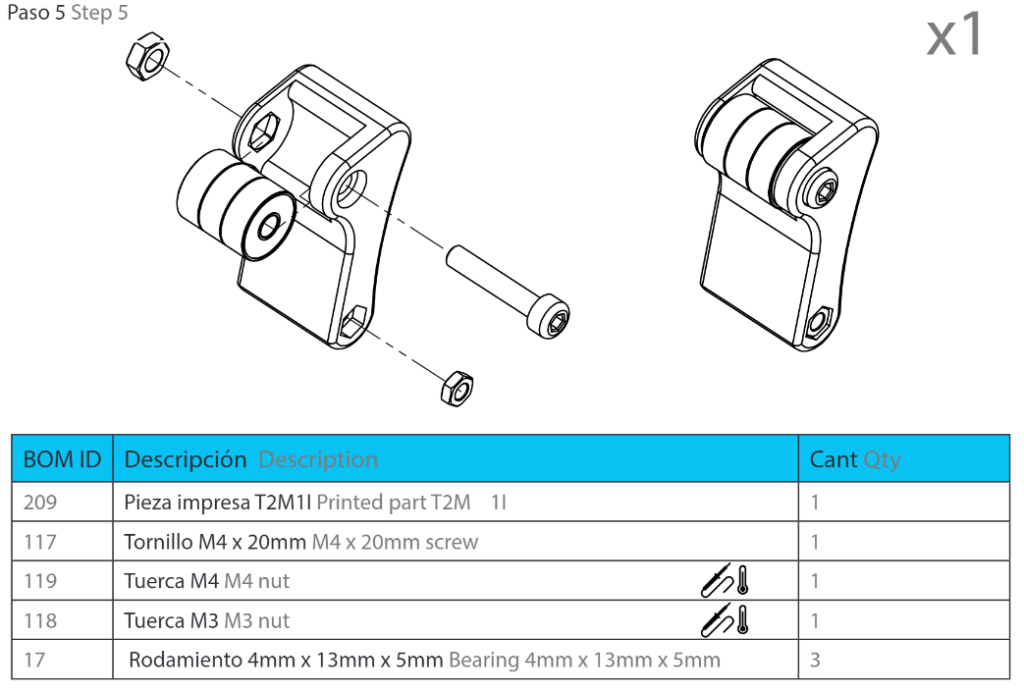
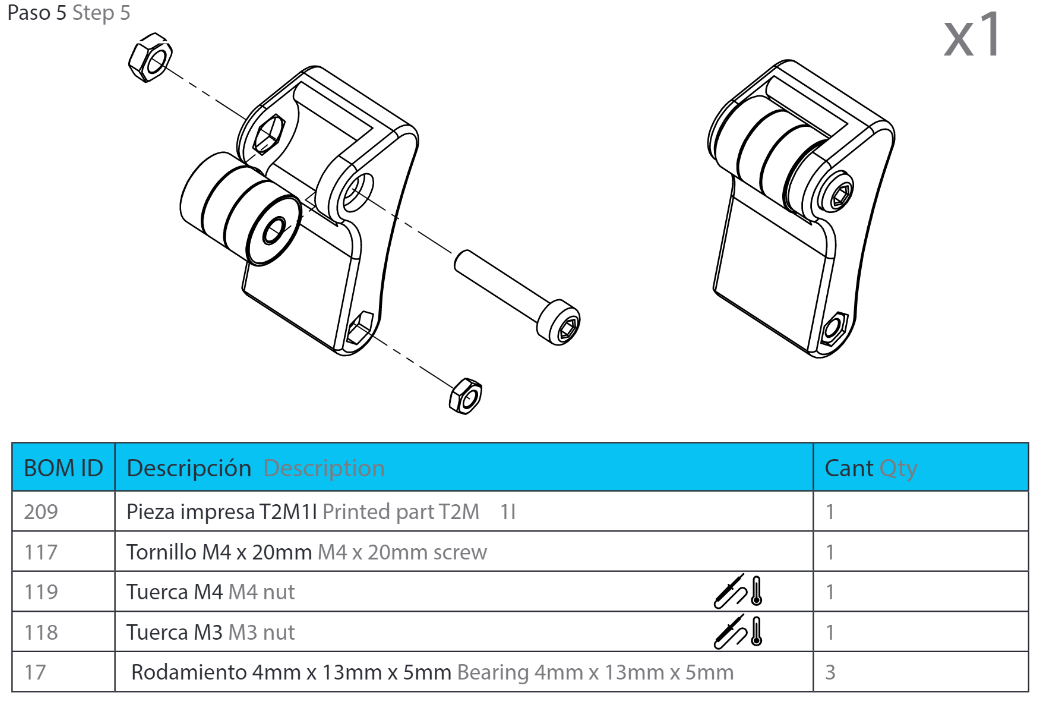
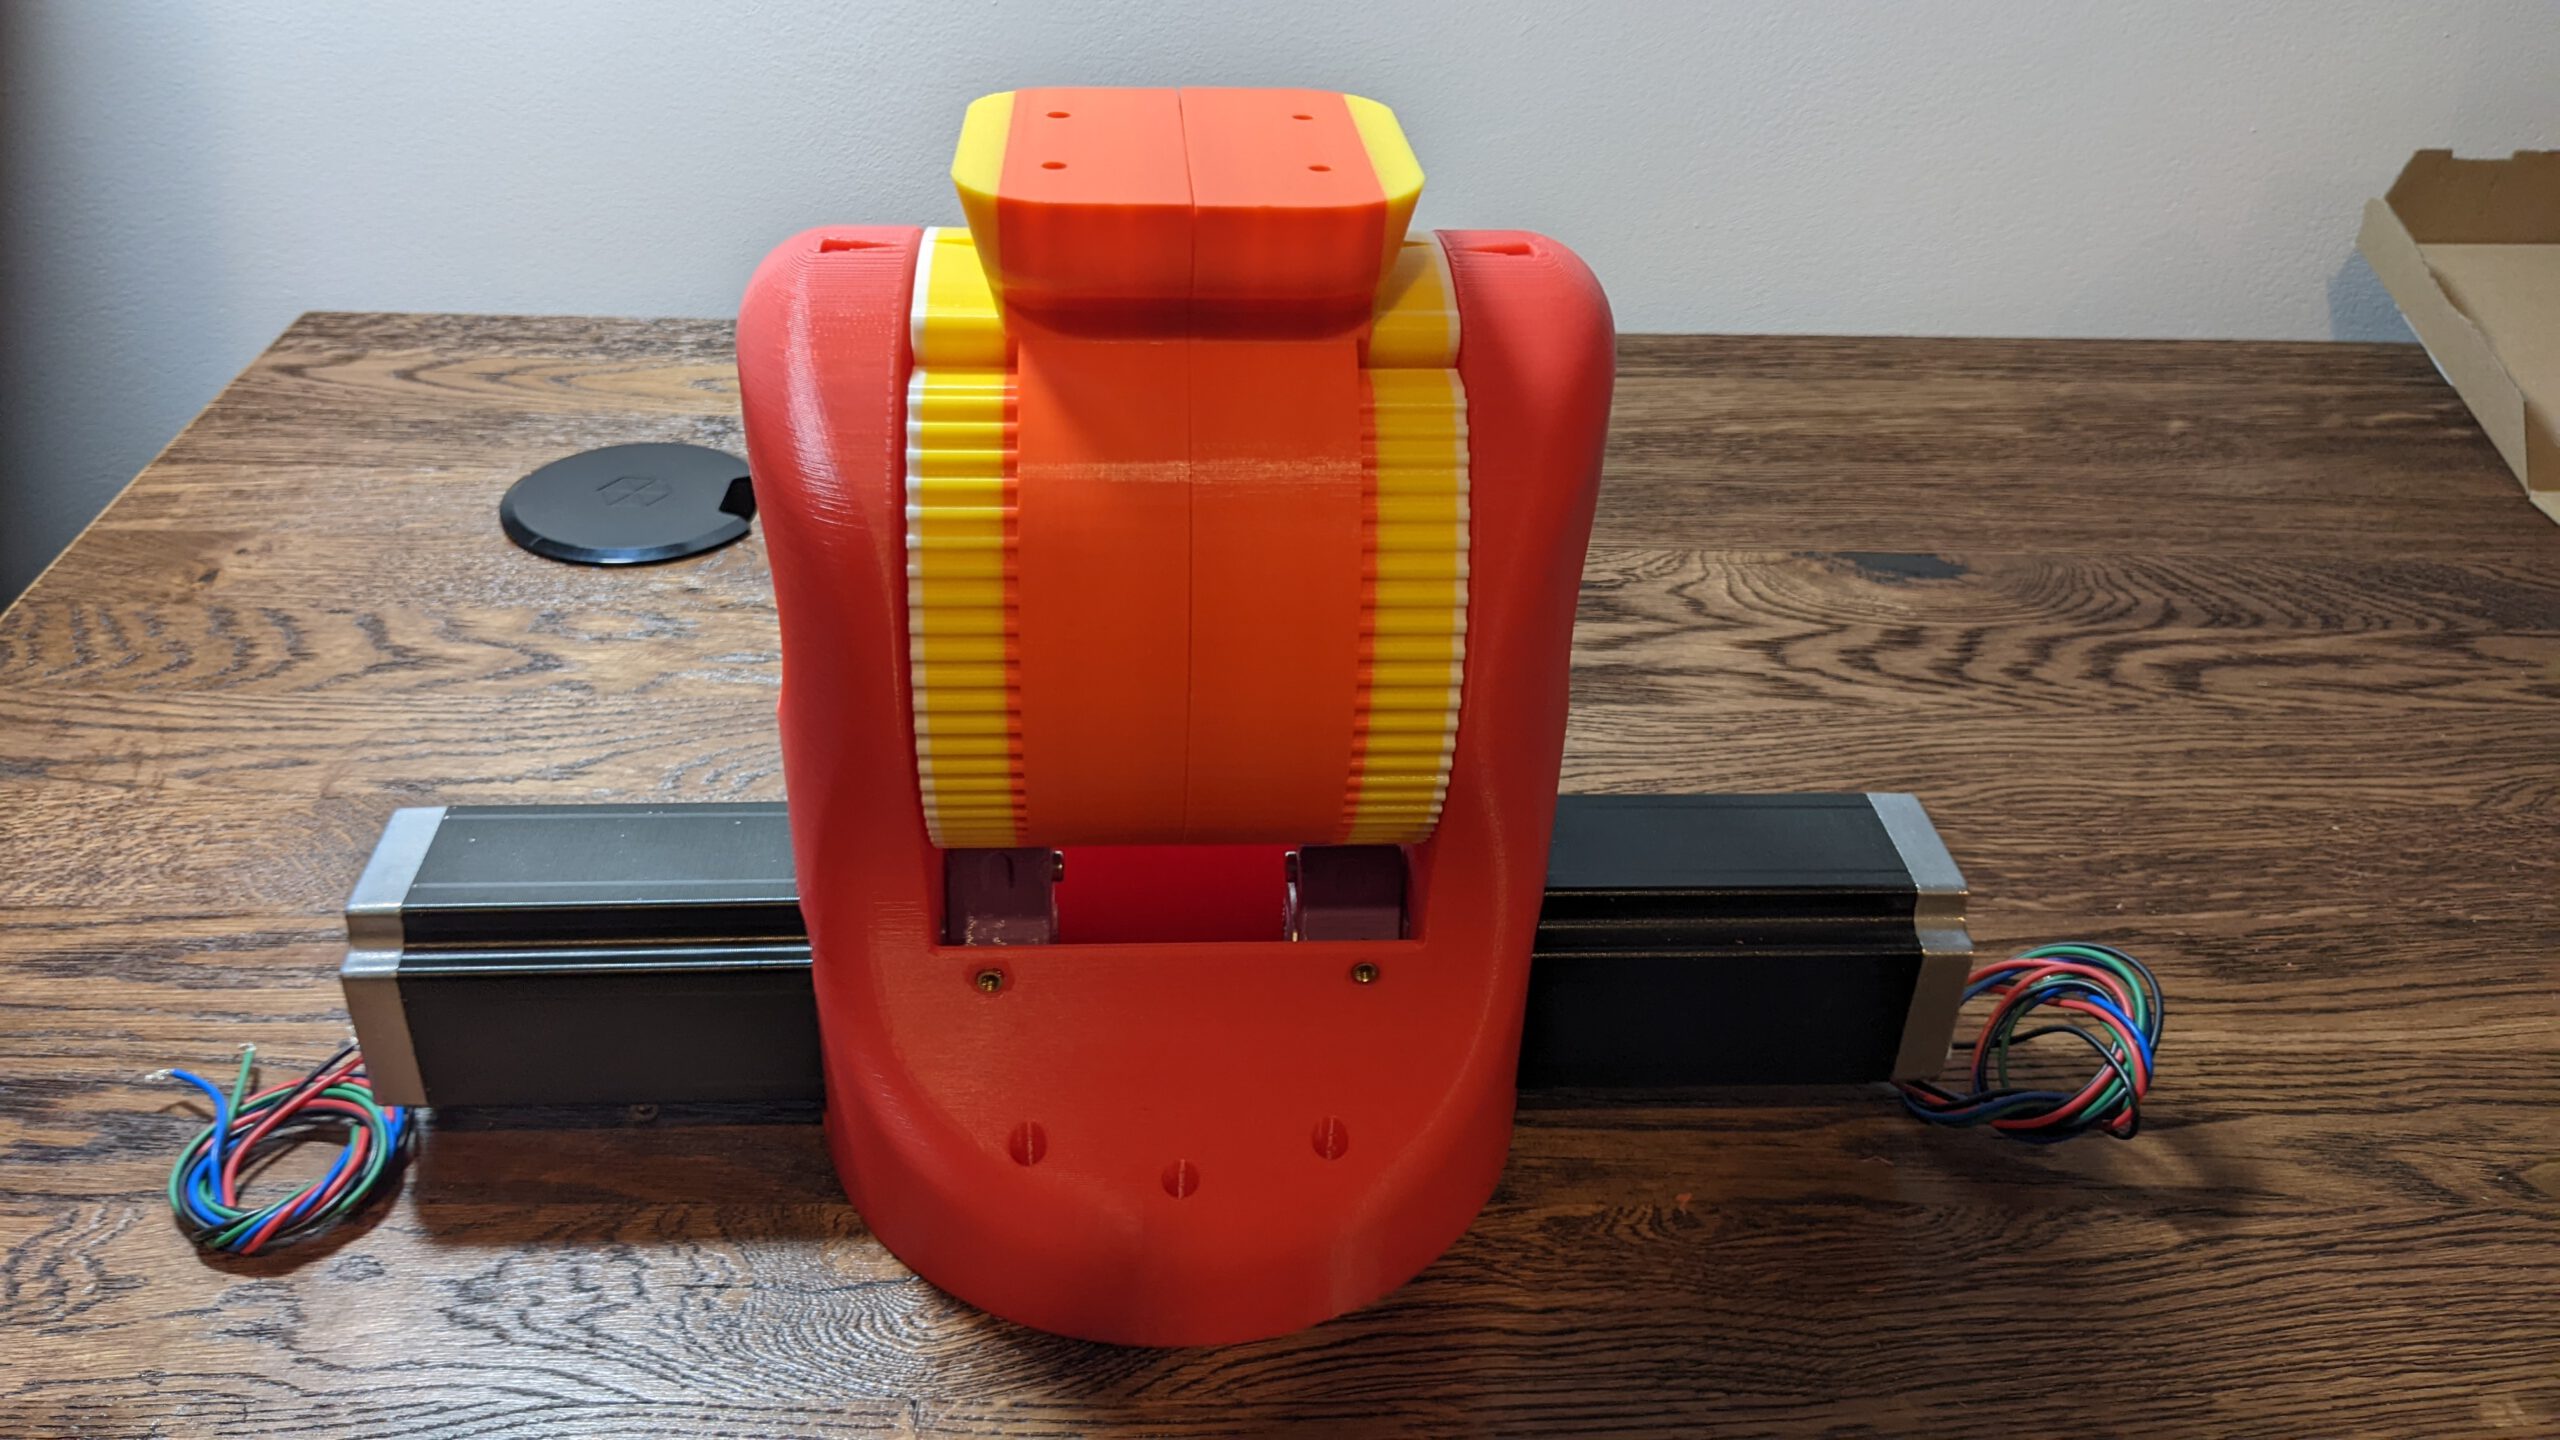
Step 5: The belt
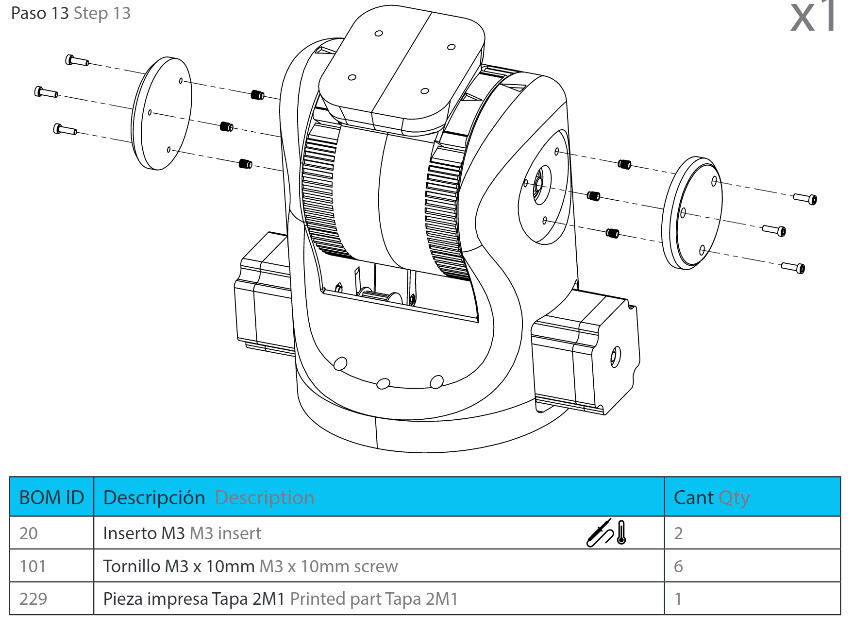
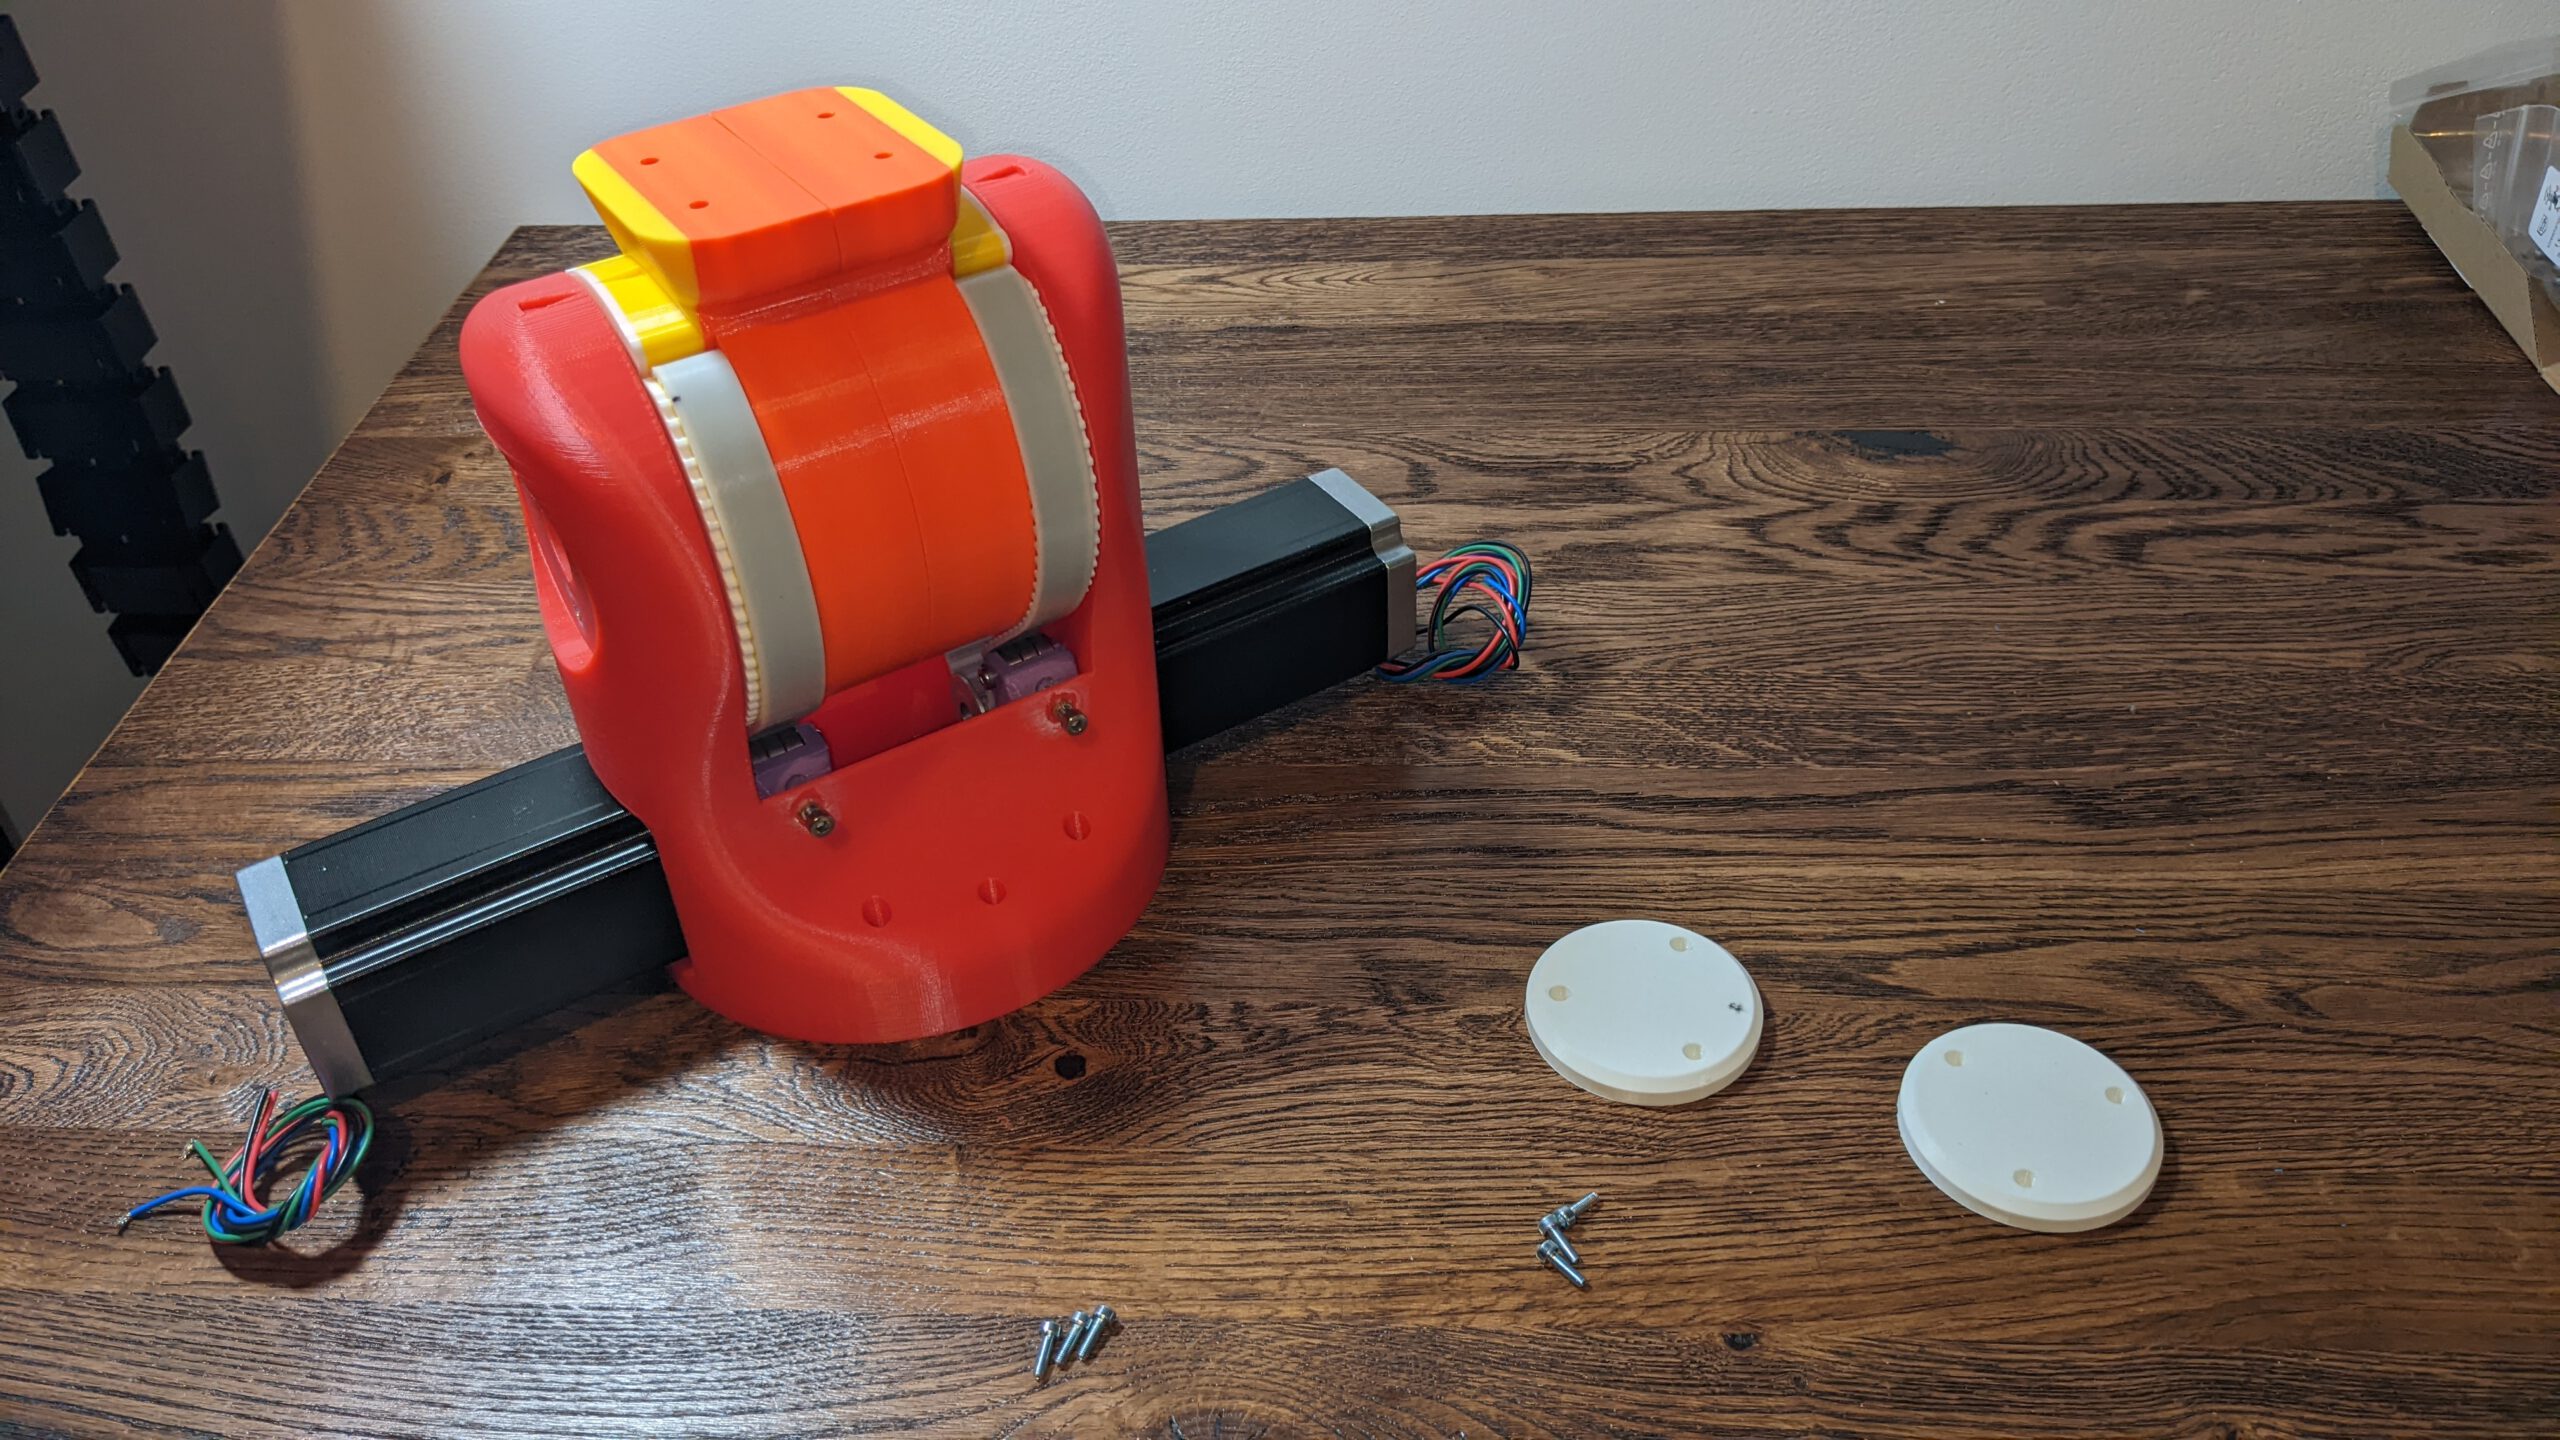
Step 6: Add the Cover
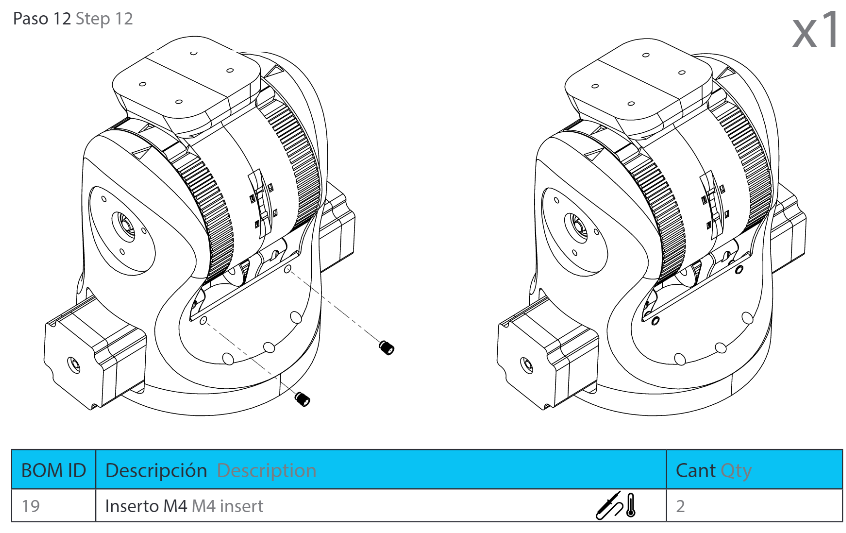
Let’s begin with the brass inserts. They have the correct inner diameter. Unfortunately, they do not have the right outer diameter. The M3 inserts are too big, and the M4 inserts are too small for the holes in the 3D-Model.
Result Part 8

Leave a Reply